External Access Configuration
Currently, external access need some manual setup and some technical background, we will make the process more user-friendly later.
There are a few tunnel services available for free use, most tunnel services require a client application running on your device, and set up a connection to the service running by the service provider, and it will give a subdomain name for you to use, if you access the URL with that subdomain, the tunnel service will forward the traffic/request to the client application.
You can use localtunnel or ngrok, both are free tunnel services. localtunnel doesn’t require registration, and it can customize the subdomain, so it’s pre-installed in Lomorage Raspberry Pi image, while ngrok need register before use, and need pay to customize subdomain, but it’s more stable and zero dependencies.
If you are using Lomorage Raspberry Pi image, the login username is “pi” and password is “raspberry”
localtunnel
If you are using Windows or macOS, you need to install nodejs first and then install localtunnel. If you are using Lomorage Raspberry Pi image, then you can run command sudo localtunnel_install.sh to install localtunnel, and you can skip step 1 an step2.
1. Install nodejs
Download and install the binaries in your platform.
2. Install localtunnel
Open the terminal and type
npm install -g localtunnel
3. Run localtunnel
Assuming the preferred subdomain name is “allice” (you can choose your own subdomain), then open the terminal and type:
lt -s allice -p 8000 --print-requests
“-s” specify the subdomain to use, “-p” specify the port forward to, Lomorage service is using “8000” by default, and “–print-requests” will output coming requests.
And if you see the output without any error message, and print out something like:
your url is: https://allice.localtunnel.me
Then you can start open that URL in your browser, and if you see requests log printing in localtunnel output, then the tunnel is set up successfully.
Sat Aug 31 2019 11:38:00 GMT-0700 (PDT) GET /
4. Config tunnel service on Lomorage APP
Open Lomorage APP on the phone, and in the settings tab, fill the tunnel service host, the host is like “allice.localtunnel.me”.
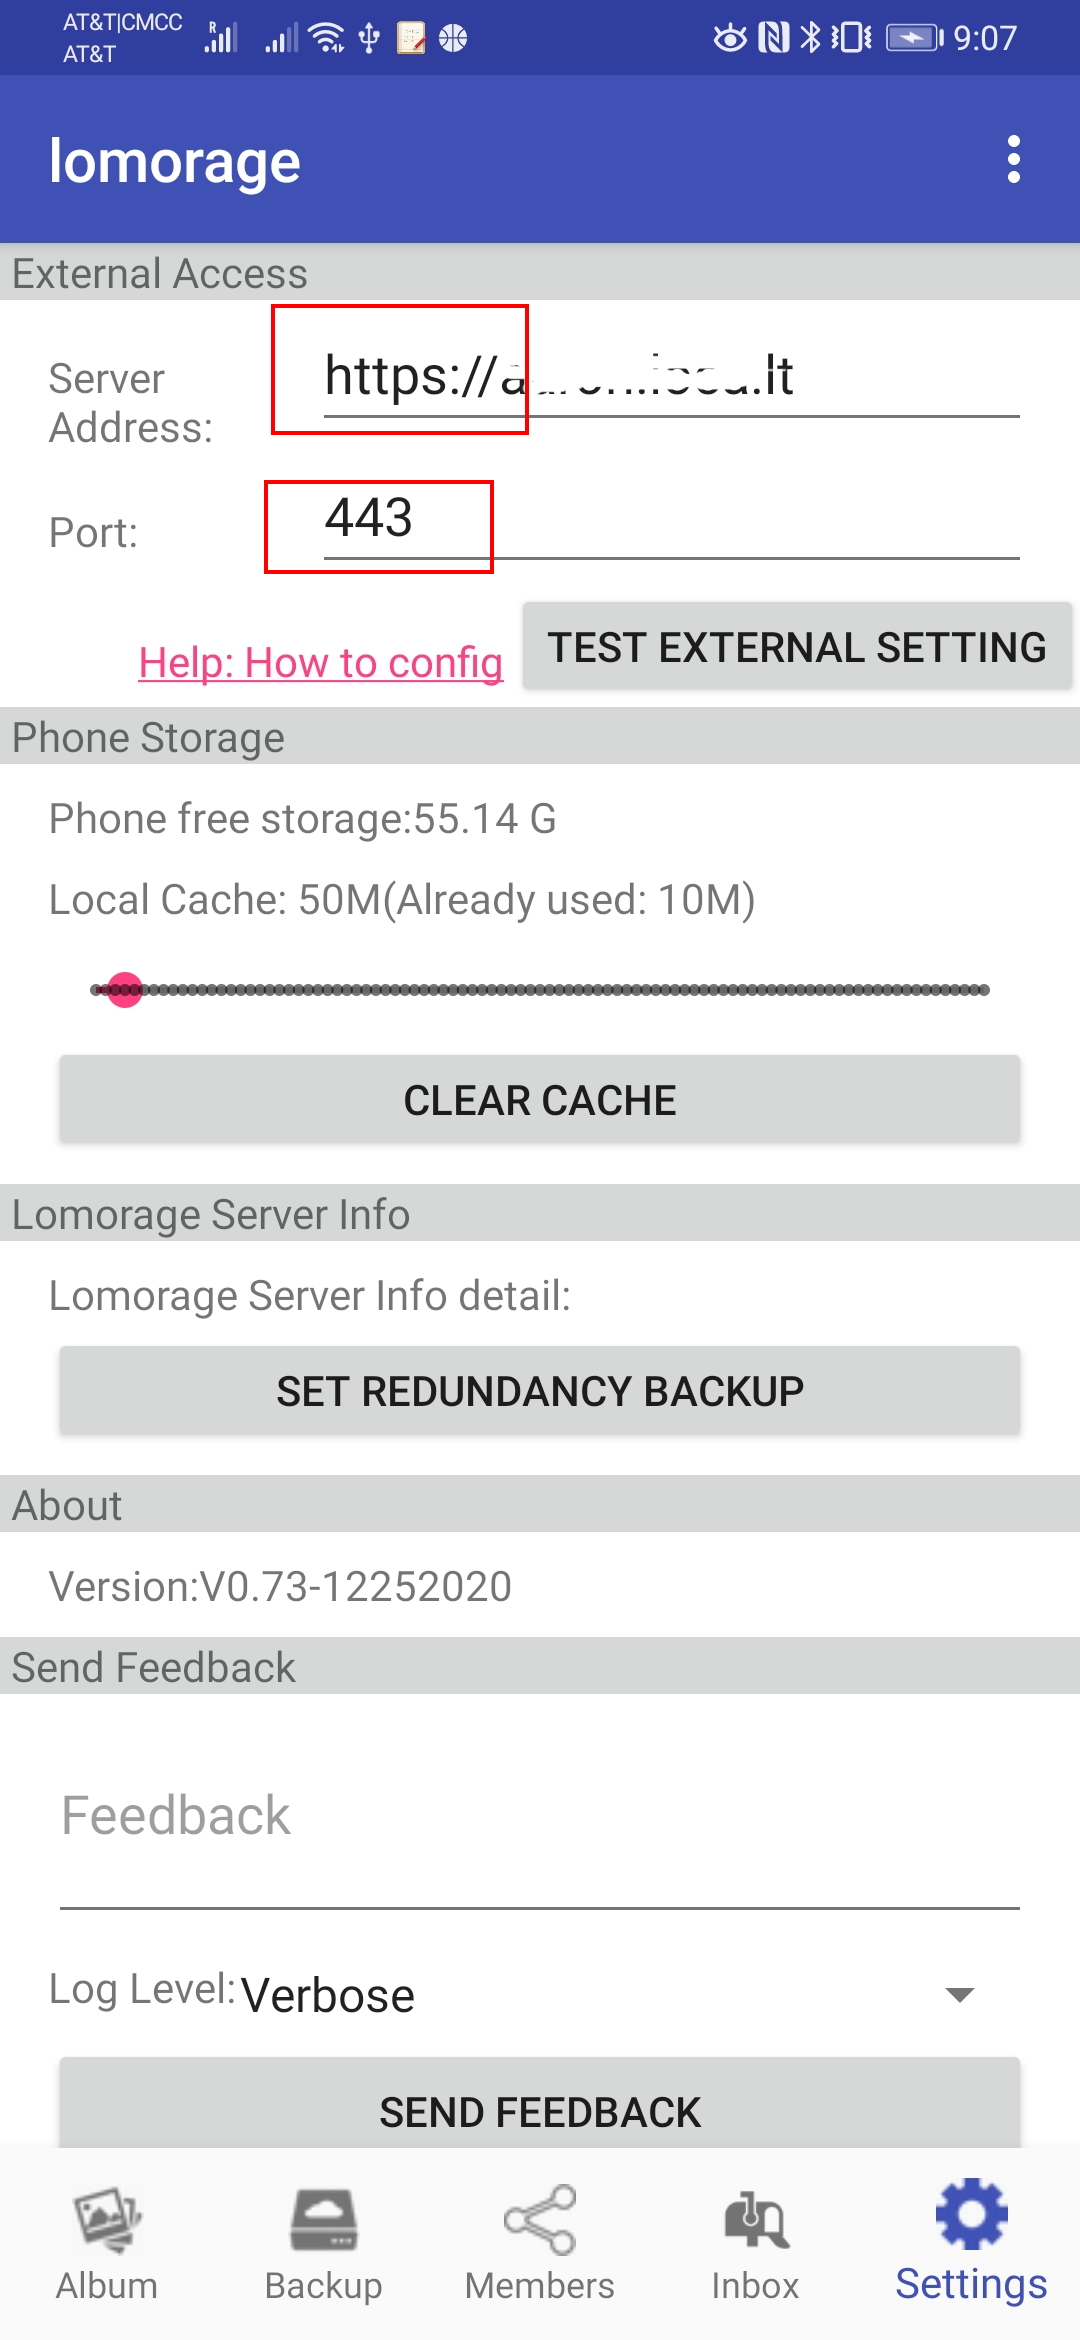
eg:on Android Lomorgae App, go to Setting page. Fill the server address as https://allice.localtunnel.me, then fill the port 443 if you did not changed the default port. If you fill the server address as http://allice.localtunnel.me, please fill the port 80, see below picture:
ngrok
1. Register
Sign up a ngrok account here, after that, it will show up a “Setup & Installation” page.
2. Download
ngrok is just one binary, you can download the version on your platform.
If you are on Raspberry Pi, you can copy the link of Linux(ARM) on the “Setup & Installation” page, which is “https://bin.equinox.io/c/4VmDzA7iaHb/ngrok-stable-linux-arm.zip" for now, and download it via “wget”.
wget https://bin.equinox.io/c/4VmDzA7iaHb/ngrok-stable-linux-arm.zip
3. Installation
unzip and get the binary. You can double click on Windows or macOS to unzip it.
If you are using Raspberry Pi, use “unzip” command:
unzip ngrok-stable-linux-arm.zip
4. Connect your account
On the “Setup & Installation” page step 3, it shows the “authtoken”, you need open terminal to run ngrok to add the authtoken to the config file.
./ngrok authtoken [your-authtoken-show-in-step-3]
5. Run ngrok
Lomorage service is using “8000” by default, and ngrok can’t customize subdomain with free account. After runnig successfully, it will show the tunnel url, the subdomain is a random string which might change in next run.
./ngrok http 8000
6. Config tunnel service on Lomorage APP
Open Lomorage APP on the phone, and in the settings tab, fill the tunnel service host, the host is like “2e30eea5.ngrok.io”.